Source Code: https://github.com/Konoca/CCWeb
Overview
If you play modded Minecraft, you’ve likely played or at least heard of ComputerCraft, a mod that adds programmable computers! While these computers are incredibly powerful and fun to mess around with, they can be very intimidating for anyone with little to no programming experience. I aimed to simplify this process in an easy-to-understand way.
CCWeb allows users to create GUIs on ComputerCraft computers using a custom text parser that automatically handles a variety of the built-in graphics options. Additionally, users can provide a Lua file that can add functionality, kind of like HTML and JavaScript. This custom text parser accepts a custom TEX-based input, that automatically converts into the associated render functions.
sequenceDiagram

participant User
participant CCWeb
participant Server

User-->>CCWeb: Launches CCWeb
CCWeb->>Server: Fetches page
Server->>CCWeb: index.ccmd
Server->>CCWeb: script.lua
CCWeb->>User: Renders index.ccmd
CCWeb-->>User: Loads script.lua
Getting started
Installation
In order to use CCWeb on any computer, all you need to do is run this command to download all of the CCWeb client files:
wget run https://raw.githubusercontent.com/Konoca/CCWeb/refs/heads/main/client/updater.lua
Once all of the files are downloaded, you can run updater.lua to keep CCWeb up-to-date! Run web.lua to open CCWeb!
Creating your first screen
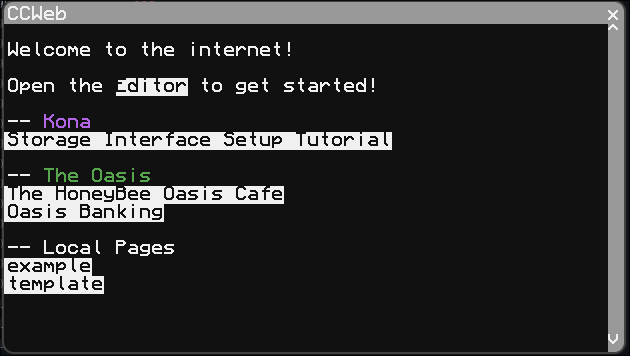
Open web.lua and click the Editor button or run editor.lua to view the built-in screen editor! Here, you can view all of the screens you have saved locally on your computer. You will see two by default: the example page which shows all of the available functions and a blank template.
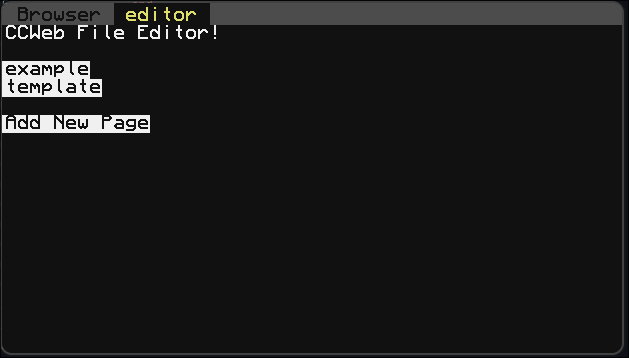
If you click Add New page, a new option will be created using the template.
Available functions
Available colors
Uses colors provided by CC: Tweaked: https://tweaked.cc/module/colors.html
| Color | String (case sensitive) | ID |
|---|---|---|
| White | white | 0 |
| Orange | orange | 1 |
| Magenta | magenta | 2 |
| Light Blue | lightBlue | 3 |
| Yellow | yellow | 4 |
| Lime | lime | 5 |
| Pink | pink | 6 |
| Gray | gray | 7 |
| Light Gray | lightGray | 8 |
| Cyan | cyan | 9 |
| Purple | purple | a |
| Blue | blue | b |
| Brown | brown | c |
| Green | green | d |
| Red | red | e |
| Black | black | f |
Simple Functions
\init{defaultTextColor}{defaultBackgroundColor}
Purpose: Defining the default text and background color to use for the entire screen using color string from Available colors.
If this function is not set, the screen will use white text and black background if not overridden by another screen.
Example usage
index.ccmd
\init{white}{black}
All text written on this screen will by default by white.
The entire background of this screen will be black.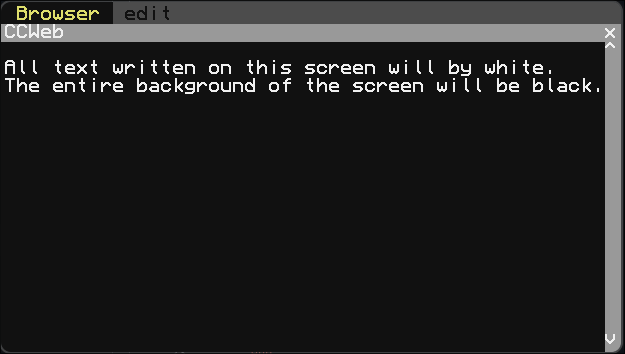
\t{text}{textColor}
Purpose: Set the text color of specific text using color string from Available colors.
Example usage
index.ccmd
\init{white}{black}
All text written on this screen will by default by white.
The entire background of this screen will be black.

\t{But this text will be red!}{red}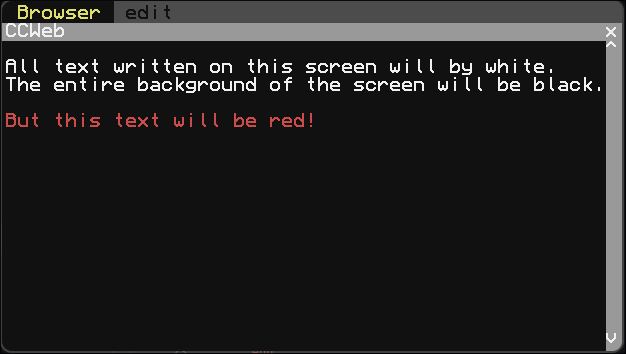
\bg{text}{backgroundColor}
Purpose: Set the background color of specific text using color string from Available colors.
Example usage
index.ccmd
\init{white}{black}
All text written on this screen will by default by white.
The entire background of this screen will be black.

\bg{But this text will be highlighted yellow!}{yellow}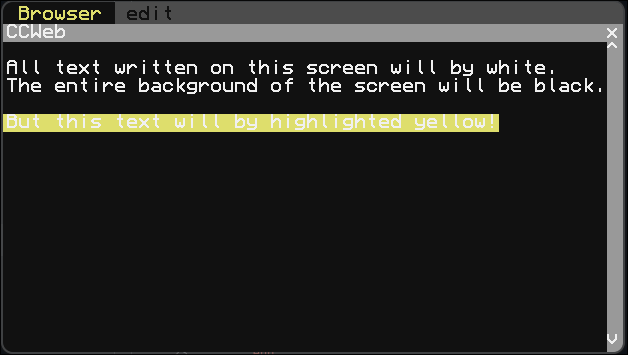
\c{text}{textColor}{bgColor}
Purpose: Set both the text and background color of specific text using color string from Available colors.
Example usage
index.ccmd
\init{white}{black}
All text written on this screen will by default by white.
The entire background of this screen will be black.

\c{But this red text will be highlighted blue!}{red}{blue}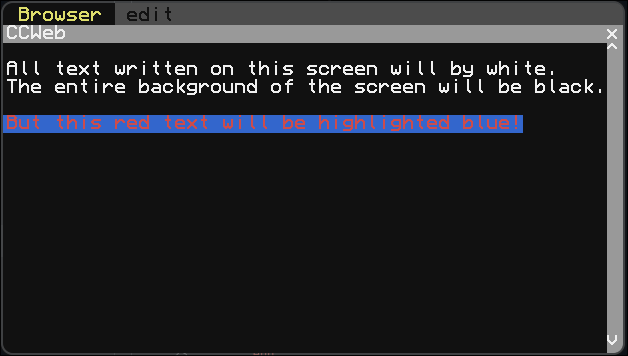
Not-so-Simple Functions
While these functions aren’t simple, they aren’t that complicated either.
\blit{text}{textColorRaw}{bgColorRaw}
Purpose: Set the text and background colors for each character in your text using color IDs from Available colors.
Example usage
index.ccmd
\blit{Different colors!}{01234567809abcdef}{ffffffffffffffff0}
\btn{text}{functionName}
Purpose: Render a button onto the screen with text on it and providing a function to execute from script.lua.
Example usage
index.ccmd
Here is a button: \btn{Click me!}{playNoiseFunction}script.lua
local M = {}

local volume = 3
local pitch = 12 -- semitones
local instrument = 'harp'

local speaker = peripheral.find('speaker')
function M.playNoiseFunction()
    if speaker == nil then return end
    speaker.playNote(instrument, volume, pitch)
end

return M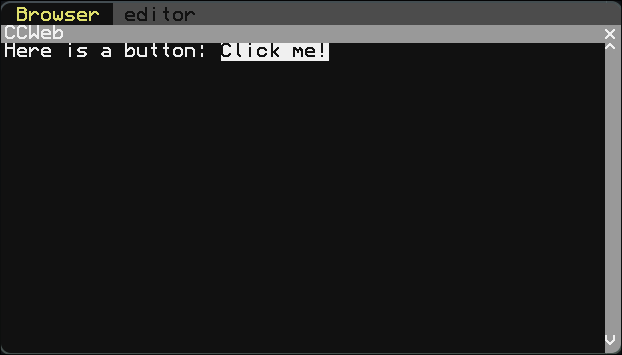
\cbx{text}{variableName}
Purpose: Render a checkbox onto the screen with text on it that will update a boolean variable inside of script.lua.
Example usage
index.ccmd
\cbx{Yes or No}{isYes}
\cbx{ }{areYouSure} Are you sure?
script.lua
local M = {}

M.isYes = true
M.areYouSure = false

return M
\input{variableName}{onSubmitFunctionName}{options}
Purpose: Render a text box onto the screen that can store user input and run a function defined in script.lua on Enter.
- Click on the box to enable text input mode
- Click anywhere else to disable text input mode
- Press ENTER key to submit text
- Current options available:
- placeholder={text}
- width={number} (0 for full width)
Example usage
index.ccmd
\input{inputText}{onSubmit1}{placeholder=Click and start typing!}
\input{inputText2}{onSubmit2}{placeholder=Small;width=20}
script.lua
local M = {}

local r = require('renderer')

M.inputText = ''
M.inputText2 = ''

function M.onSubmit1()
    r.currentMD = r.currentMD..'\n-'..M.inputText
    M.inputText = ''
end

function M.onSubmit2()
    r.currentMD = r.currentMD..'\n-'..M.inputText2
    M.inputText2 = ''
end

return M
Adding your own Function
If none of the functions provided above fit a need of yours, you can create a new function using your script.lua file:
local M = {}

local parser = require('parser')

function M.handleNewFunction(input1, input2, optionalInput3)
	-- logic
end

function M.onLoad()
	p.tagTable['\\custom'] = function(...) handleNewFunction(...) end
end

function M.OnUnload()
	p.tagTable['\\custom'] = nil
end

return M
Users are required to provide 2 inputs, but they can also optionally input a 3rd. Some tags can require this 3rd input like \c, or can use it for optional parameters like \input.
Example
local M = {}

local p = require('parser')

local function handleCbx(text,  booleanName)
    local bool = M[booleanName]

    local color = bool and colors.green or colors.red
    p.window.setBackgroundColor(color)
    p.window.setTextColor(colors.black)

    local startX, startY = p.window.getCursorPos()
    p.window.write(text)
    local endX, _ = p.window.getCursorPos()

    p.window.setTextColor(p.defaultTextColor)
    p.window.setBackgroundColor(p.defaultBgColor)

    local func = function() M[booleanName] = not bool end
    p.buttonTable[startY] = p.buttonTable[startY] or {}
    for i=startX, endX, 1 do
        p.buttonTable[startY][i] = func
    end
end

function M.OnLoad()
    p.tagTable['\\cbx'] = function(...) handleCbx(...) end
end

function M.OnUnload()
    p.tagTable['\\cbx'] = nil
end

return M